作成 方法は まず css 側と html 側で 分けています まず css 側の 部分 を 見てみると
.roundbox {
        background-color: #ccffcc;
        color: #333300;
}

.roundtop {
        height:15px;
        background: url(1022w15h15img-grtopr.png) no-repeat top right;
}

.roundtop span {
        background: url(1021w15h15img-grtopl.png) no-repeat top left;
        display:block;
        height:15px;
        width:15px;
}

.roundbottom {
        height:15px;
        padding:0; margin:0;
        background: url(1024w15h15img-grbotr.png) no-repeat bottom right;
}

.roundbottom span {
        background: url(1023w15h15img-grbotl.png) no-repeat bottom left;
        display:block;
        height:15px;
        width:15px;
}
次は html 側を 見てみましょう
<!DOCTYPE html PUBLIC "-//W3C//DTD HTML 4.01 Transitional//EN">
<html lang="ja">
<head>
<meta http-equiv="content-type" content="text/html; charset=EUC-JP">
<meta name="keywords" content="css,roundbox">
<meta name="description" content="linuxでcssを練習;roundbox">
<link rev="made" href="mailto:mm@cricrima-sa.no-ip.info">
<link rel="stylesheet" type="text/css" href="roundbox.css">
<title>nyantarou and css roundbox  に ついて</title>
</head>
<body>
<p><a href="r001.html#round1" title="">戻る</a></p>

<hr>
<h1>nyantarou and css  roundbox  に ついて </h1>

<p> これは roundbox の簡単な 見本 です。</p><p><br></p>

<div class="roundbox">
<div class="roundtop"><span></span></div>

<br >
        <h2>roundbox の 見本</h2>
        <p>これは   <b>roundbox</b>の
        簡単な 見本 です。</p>

<br >
<div class="roundbottom"><span></span></div>
</div>

<hr>
<p><a href="r001.html#round1" title="">戻る</a></p>

<p>Copyright © 2005.non-sumi  にゃんたろう Nyan  nyan nyantarou  All Rights Reserved.</p>

</body>
</html>
さて どうなるか 見てみましょう 見本に行く と 簡単な 見本が 見れます、css と html に ついては 良いと しましょう、し かしながら 4隅の 圖を 作る 必要が あります、今回 gimp で 作成します。
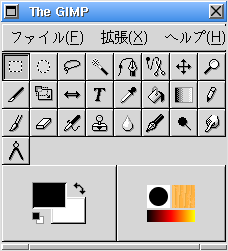
$ gimp & 何ぞ 入力してみましょう さすれば、このような 最初の 起動する
ものが、画面上に 現れると 思います。
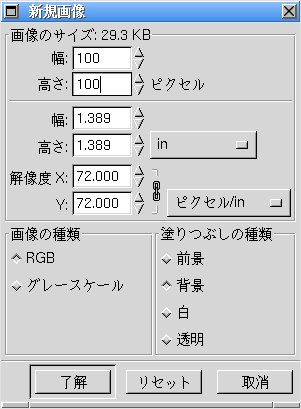 これの ファイルを 選択 新規を選択し
て新規画像で 幅、高さ其々 100ピクセルと 入力する、そうして 了解すると。
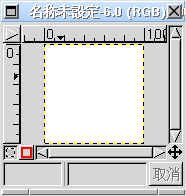 このような 画面があらわれます。
この 画面から 最初の 画面の 選択領域とか 塗りつぶし とかを 選択していっ
て 図形を 作成 します。色を 選択する 画面を 参考に 表示すると。
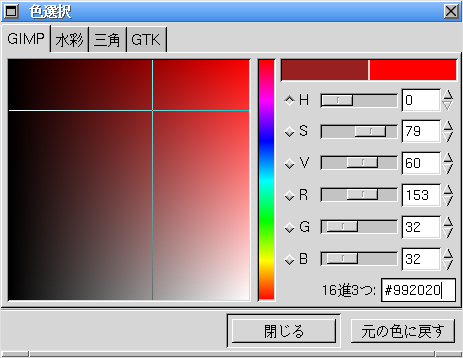 の ような 画面に なります。
なんとかして このようなものを 作成します。
見えますか
これは 4分割 する前の 圖です。これをどこかで 区
切ってその一部分を 取りだしましょう
これです。 当然 大きさは 幅 50px 高さ 50px の ものです
そうして これを gimp で 90° 回転していって 4個の 圖を 作成するのです
今回はわかり安くするために 大本を 幅 100px 高さ 100px の もので 作成 しましたが 小さいものを作成して 、表示段階で 拡大する方が 良いでしょう
にゃんたろうが 聞き及ぶ範囲では なるべく小さい方が サーバーに負担を掛 けないと 聞いております 当然 css ファイルも 絞って 極力 少なくして、画像 も 同じものを別々に 再度 読み込むのではなく 1箇所に まとめておいて そこ から 読み込む なんぞの 対応すべき と 聞いて おりますが いかんせん そのつ ど そのつどが せい一杯 なので 良くは 無いのですが、対応し きれて おりま せん。
それは、それで おいといて新しい 見本を 見ていきましょう 今回は css の 方を 新しい図で置き換えたものを作成 します。html ファイルの 内容は 基本的に、変更していません 但し 読み込む css ファイルの 名前のみ 変更します。最初の 見本は 通常作成している もの の 内 一部分を 取りだしてあるので そうかな? という感じで 見ておられたと 思いますが 今回の 見本は かなり 異なった 雰囲気に なります。
まず gimp にて 4個の 画像を 作成します つまり 4分割の画像を 90度 回転していって 作成します。
上部左 の 圖
6001-w50h50top-l-part1-4round.png 
上部右 の 圖
6002-w50h50top-r-part1-4round.png 
下部左 の 圖
6003-w50h50bot-l-part1-4round.png 
下部右 の 圖
6004-w50h50bot-r-part1-4round.png 
それでは css を 見て行きましょう,と いうより 変更 場所の 方が 良いで しょう
$ diff -s roundbox.css roundbox2.css
7,8c7,8
<         height:15px;
<         background: url(1022w15h15img-grtopr.png) no-repeat top right;
---
>         height:50px;
>         background: url(6002-w50h50top-r-part1-4round.png) no-repeat top right;
12c12
<         background: url(1021w15h15img-grtopl.png) no-repeat top left;
---
>         background: url(6001-w50h50top-l-part1-4round.png) no-repeat top left;
14,15c14,15
<         height:15px;
<         width:15px;
---
>         height:50px;
>         width:50px;
19c19
<         height:15px;
---
>         height:50px;
21c21
<         background: url(1024w15h15img-grbotr.png) no-repeat bottom right;
---
>         background: url(6004-w50h50bot-r-part1-4round.png) no-repeat bottom right;
25c25
<         background: url(1023w15h15img-grbotl.png) no-repeat bottom left;
---
>         background: url(6003-w50h50bot-l-part1-4round.png) no-repeat bottom left;
27,28c27,28
<         height:15px;
<         width:15px;
---
>         height:50px;
>         width:50px;
基本的には 圖 の 大きさ 15px から 50px に して 4個の 圖 を 置き換え た ということです 本質的には 同じ ということです
html ファイルも 同様に 変更した 場所を 見ると
$ diff -s r002.html r003.html
8c8
< <link rel="stylesheet" type="text/css" href="roundbox.css">
---
> <link rel="stylesheet" type="text/css" href="roundbox2.css">
12c12
< <p><a href="r001.html#round1" title="">戻る</a></p>
---
> <p><a href="r001.html#round2" title="">戻る</a></p>
32c32
< <p><a href="r001.html#round1" title="">戻る</a></p>
---
> <p><a href="r001.html#round2" title="">戻る</a></p>
html では css ファイルの 名前と (戻る 場所の 指定:これは 当然)であ るので 本質的には 同じことです。では実際に 見本2を見に行く ことに しましょう、どうですか これで round box の 作成 方法が 理解できた でしょうか、というより 作成できるでしょうか、ということです。この方法を 使用すれば round box を 作成 する事が可能です。当然 body の 背景色と round box 内部の 背景色の 指定を 間違えると 見本2 のようなものに なり 見苦しい ものに なりますが 背景色の 組合せで うまく 見える 様に なります。